Brassicas for Autumn and Winter
Autumn and Winter Brassicas are a staple for us and include, cabbage, cauliflower, sprouting broccoli, brussel sprouts and kale. I sow between May and June for planting in June and July though you can continue planting many into August, including Purple Sprouting Broccoli and Spring Cauliflowers.
Brussel Sprouts: Traditionally, there are three main sowing times for sprouts, Early April for early sprouts, Early May for Mid Season sprouts and early/mid June for Late Season Sprouts. I generally only grow late sprouts which will start cropping in November and continue for up to three months. I freeze any that we do not use fresh and so have a good supply well into the Spring. This year, I grew he variety Bedford Darkmar a winter variety that is new to me but looks promising.
All brassicas germinate quickly. I sow in a seed tray for pricking out into modules or pots and the seedlings germinated just 3 to 5 days. I pricked out a week later and plants are ready to go out into the garden in about 4 weeks.
Cauliflower: I sow from May to July and place them on the heat bench if required, seeds germinated in 3 to 5 days and are pricked out about a week later for transplanting when plants are 4-5 weeks old. Cauliflowers are heavy feeders and need good soil and plenty of space. They can be finicky to grow but taste so much better than shop bought crops that I consider them well worth the effort. If I have to hold Cauliflowers while waiting for a bed to become available fot them, I pot them on into 3 inch pots
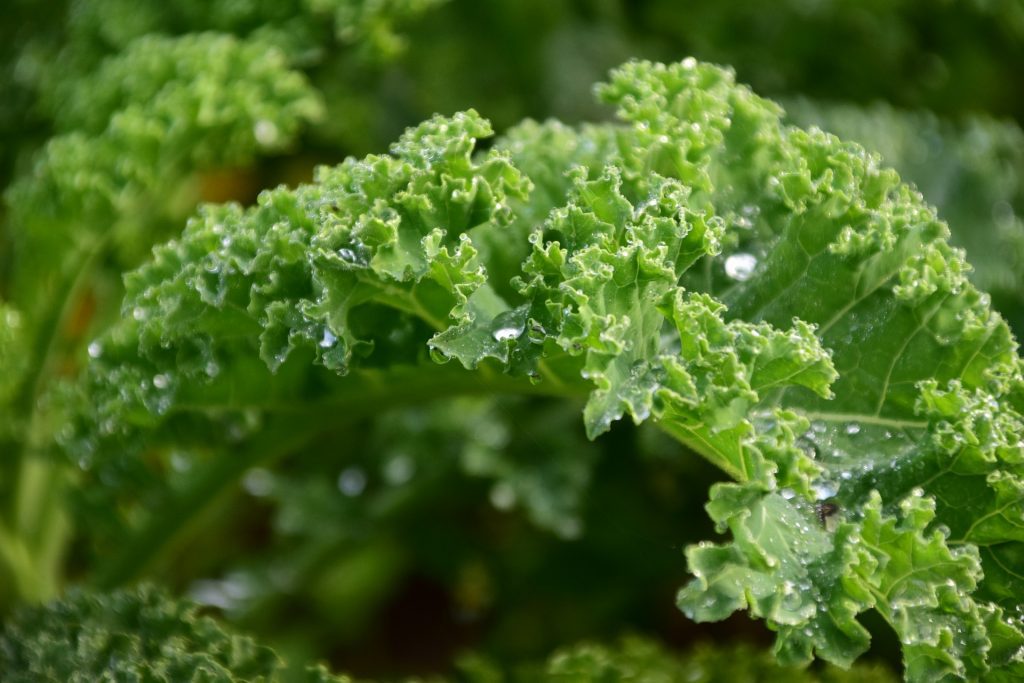
Kale (Cavolo Nero): I love this Kale that up to recently was grown only in Italy. It is a reliable cropper and goes on for months. I sow it in March for an early crop and again in late June for a winter crop.
Kale (Borecole): Kales are wonderful hardy plants and are used for a variety of purposes. In the Bare Acre Kitchen, we use kale in our green eggs (See recipes), and it t makes its way into stir fries as well as been used as a green vegetable. I love Red Russian (A beautiful plant in its own right) as well as the traditional Curly Kale which we use for Colcannon.
Kalettes: I tried Kalettes for the first time last year. I ordered seed (No variety name) and sowed them on 11 April and placed then on the heat bench, seeds germinated in five days and were pricked out on 14 April and planted out into the garden on 14 May. They were available to harvest from late August and to be honest, I didn’t see the point in growing them as they are less flavoursome than standard kales.
Purple sprouting broccoli: Another mainstay for us. I generally sow PSK in mid to late June for planting from Mid July until early August. The mistake made by many first time gardeners is to sow PSB too early, leading the plant to come into production too soon and often bolting.
Savoy cabbage: My personal favourite of all the cabbages. I sow in June and seeds germinated in five days. Plants can go out about 4 weeks after sowing. I select an early and a late variety. This year I opted for Winsing which is a wonderful German bred variety with a long season of harvest and Impressa which preformed very well in 2021.
Protecting Brassicas: Brassicas are important to us here so we go to some trouble to ensure our crops are successful. Brassicas love Irish conditions, they relish cooler weather and want plenty of moisture, in fact, lack of water is a major cause for failure or poor crops with most brassicas and in particular cauliflower. However, brassicas are subject to a myriad of problems, foremost among them are pests and, in our case wind which knocks young plants about while we want to them to establish quickly.

To overcome these issues and to keep our crops organic, we take a number of steps that might not be viable for commercial growers but that give us good yields of healthy crops.
Potting on: Brassicas make big plants and need deep firm planting, this can be an issue on our site which though wonderfully early, is exposed to the prevailing winds. To deal with this, I often pot on all late season brassicas, hence my reason for sowing in trays.
The steps are sow, germinate, prick out into modules as soon as ready, then, three weeks later, I pot on using 10cm pots. This gives me big plants with well developed root systems about five or six weeks after sowing and also allows me to hold the plants back for a few extra weeks if planting conditions are less than favourable or if I am waiting for beds to be free of early crops.
Deep, firm planting: All brassicas, with the exception of Kohl Rabi and some of the Chinese brassicas, need to be planted deeply and firmly. My pot grown plants allow this and are buried up to the first true leaves and trodden in firmly. If the ground is dry, I recommend firming the plants again after you have watered them.
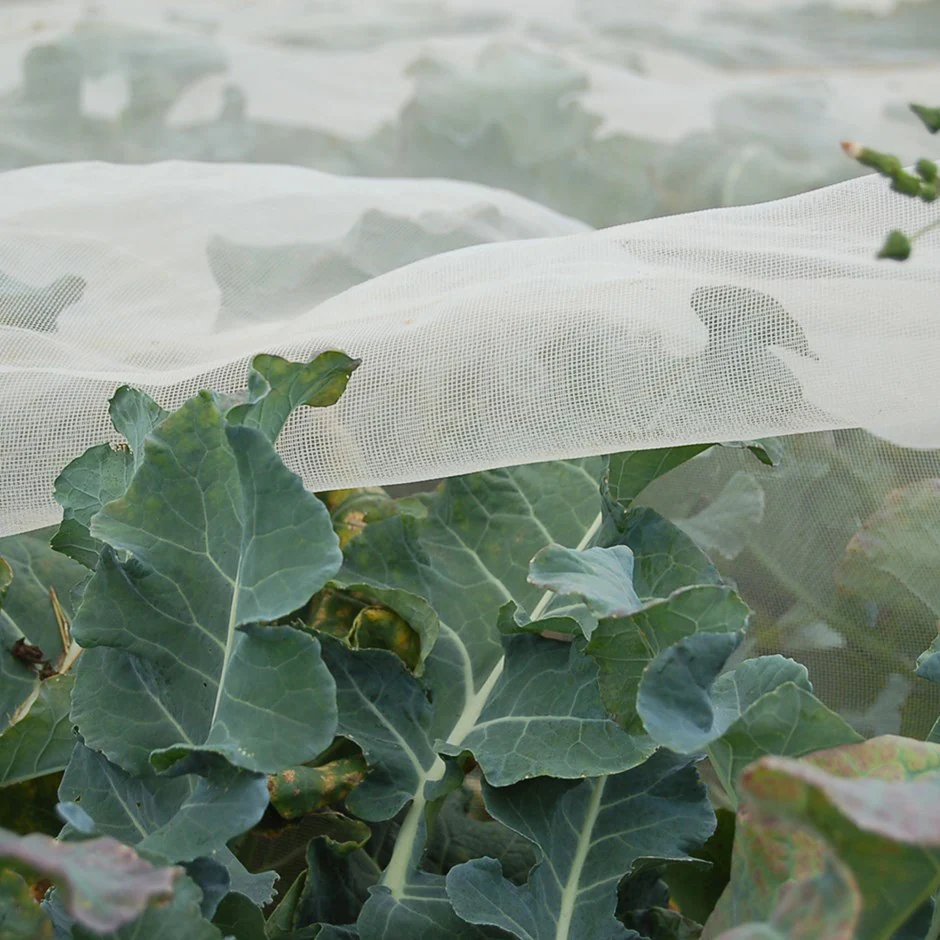
Protection from predators and the elements: Brassicas are liable to attack from myriad of pests including, cabbage root fly (Lethal and impossible to treat once damage is done) flea beetle, aphids, butterflies, pidgeons, rabbits and hares. (It’s a wonder we can grow them at all) There are a number of ways of dealing with each of these problems individually, but we have adopted a single solution. We use biomesh or enviromesh, which is a close woven netting and prevents pests from landing on the plants. The netting is secured on permanent cloches. Net can be laid directly on the crop or can be used to build cloches.
Making cloches: There are loads of ways to make cloches and loads of information online so I will only deal with how we make ours.
As I said, we used enviromesh (from Agralan.) This comes in a variety of sizes, we used the 2.2 meter and the 2.5 meter sheets.
Supports: The supports for the cloche are 25mm MDPE water pipe which is cut to the required size. We cut ours over a meter longer than needed so it can be buried deeply and allow enough height for tall growing sprouts, purple sprouting broccoli and cauliflowers. Our final length is just short of 3 meters per hoop.
Installing: To install the cloche with some degree of certainly that it will remain secure, we used a crowbar with a pointed end. This is driven into the ground to the required depth on one side of the bed, with holes every 2.5 meters along the length. Once holes are made on one side, the pre-cut hoop is inserted as deeply as it will go. Once all are in on one side, the matching holes are made on the second side and again the pipe is inserted to complete the structure.
If you follow this system, you may need to adjust hole depth to have the row of hoops running evenly. The mesh is secured over the hoops. We use steel pegs on one side and rocks on the other, which means the cover can be lifted and replaced easily for planting, weeding and harvesting, and then replaced with ease. It is vital to ensure there are no gaps under the mesh.
Once installed, the cloche protects our crops from both predators and wind, and it also rises the temperature a little so giving the crops a really good start in life.
These low hoop tunnels can be permanent or temporary and can remain in place with fleece underneath to give early crops additional protection in the spring. I intend to use them for low poly tunnels next Spring for a crop of extra early Homeguard potatoes.
We currently have winter brassica plug plants available at the Farm Shop. We have Sprouts, Romanesco, PSB, Savoy Cabbage, both early and late and Spring Cauliflowers. Drop in and see us.